How to Make Painting Canvas
Share
Creating your own painting canvas can be a rewarding and cost-effective endeavor for artists seeking more control over their materials. The process involves careful selection of materials, precise assembly of the canvas frame, and meticulous stretching and priming of the canvas material.
By understanding the steps involved in making a painting canvas, artists can tailor the size, quality, and sustainability of their canvases to suit their artistic vision. This approach not only provides a sense of ownership over the creative process but also allows for a deeper connection to the finished artwork.
<h2>Key Takeaways</h2>
<ul>
<li>Select the right materials, such as cotton or linen, for the desired texture and absorbency of the canvas.</li>
<li>Use high-quality wood stretcher bars and secure them together with notches and wood glue for added strength and stability.</li>
<li>Build the canvas frame by cutting lumber to the required sizes, attaching the boards with wood glue and screws, and securing a drop cloth section larger than the frame with a staple gun.</li>
<li>Cut and assemble the canvas by fitting the stretcher bars together, cutting the canvas to fit the frame with excess to wrap around the edges, and securing it with a staple gun or hammer and nails. Apply acrylic-based gesso for priming the canvas.</li>
</ul>
<h2>Selecting the Right Materials</h2>
<div class="zw-youtube" style="position: relative; width: 100%; height: 0; padding-bottom: 56.25%;"><iframe style="position: absolute; top: 0; left: 0; width: 100%; height: 100%;" title="YouTube video player" src="https://www.youtube.com/embed/f-BhsNopwrk" frameborder="0" allowfullscreen="allowfullscreen"></iframe></div>
When selecting the materials for your painting canvas, it is crucial to carefully consider the type of material, such as cotton or linen, in order to achieve the desired texture and absorbency for your artwork.
Stretcher bars play a significant role in providing a sturdy frame for the canvas. Ensure that the bars are straight and sturdy to guarantee a well-constructed frame for your canvas panel. Opt for high-quality wood and cut notches at the ends to interlock the bars securely. Use wood glue for added strength and stability.
Priming the canvas with gesso is essential to provide a smooth and stable surface for painting. Choose acrylic-based gesso to ensure the longevity of your artwork.
When considering the material for the frame, hardboard or birch plywood can provide added stability, ensuring a durable and long-lasting canvas panel. Use a staple gun to secure the canvas to the frame, ensuring a taut and even surface.
Additionally, using a drop cloth for your work area can protect surfaces from any accidental spills or splatters, allowing you to focus on creating your masterpiece.
<h2>Building the Canvas Frame</h2>
When constructing the canvas frame, precision and care are essential to ensure the foundation for your artwork is sturdy and long-lasting. To start, gather the necessary materials, including canvas boards, heavy-duty wood frame, corner braces, and a saw to cut the pieces.
Visit a store like Home Depot to obtain high-quality lumber, ensuring that it is straight and free from defects. Next, cut the lumber to the required sizes using a miter saw or miter box, and then drill pocket holes in the smaller boards for attaching them together using wood glue and screws.
It is crucial to ensure that the boards are aligned at a right angle, and a speed square can be used for this purpose. Once the frame is assembled, cut a drop cloth section larger than the frame and secure it with a staple gun, starting from the center of each side. This will form the base for the canvas panels.
<h2>Cutting and Assembling the Canvas</h2>
To begin cutting and assembling the canvas, gather the necessary supplies including canvas, stretcher bars, hammer, staple gun, scissors, gesso, paintbrush, and sandpaper.
Follow these steps to ensure a precise and secure assembly:
<ol>
<li>Fit the stretcher bars together and lightly tap them with a hammer to secure the canvas frame, ensuring that the corners are square and the bars are aligned correctly.</li>
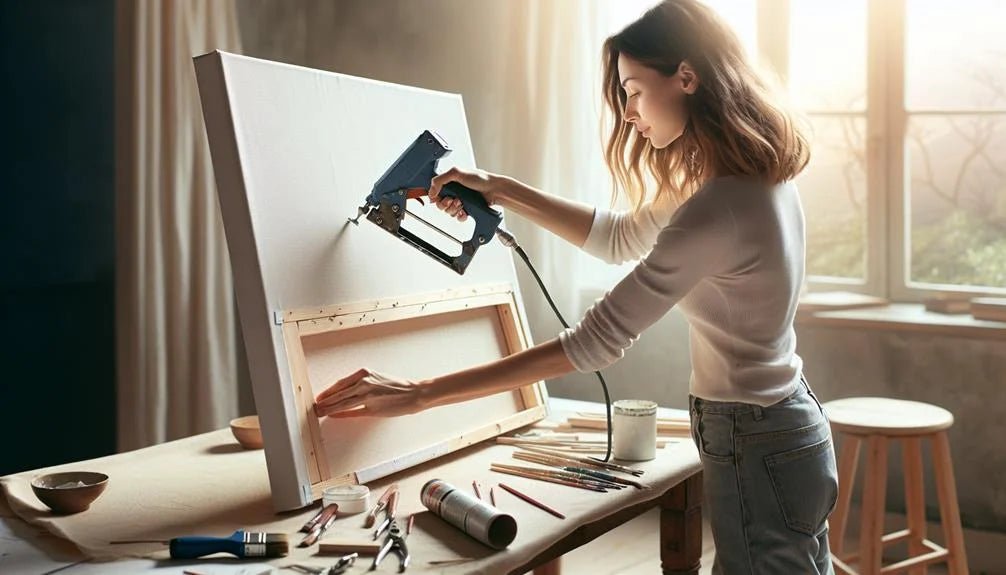
<li>Cut the canvas to fit the wood frame, leaving enough excess to wrap around the edges. Secure the canvas to the frame using a staple gun, ensuring a tight and even stretch, or by using a hammer and nails in a specific pattern for a traditional approach.</li>
<li>Shake and pour acrylic-based gesso onto palette paper and apply a thick coat to the entire canvas surface using a paintbrush. Allow each layer to dry thoroughly before applying the next, resulting in a smooth and primed painting surface.</li>
<li>For making canvas boards, gather materials such as board, canvas material, Miracle Muck Glue, rotary blade, ruler, and brown wrapping paper for backing. Use the glue to secure the canvas material onto the hard board, ensuring a smooth and flat finish for painting.</li>
</ol>
<h2>Stretching and Attaching the Canvas Material</h2>
Stretching and attaching the canvas material requires precise handling and attention to detail to ensure a smooth and taut painting surface. After fitting the stretcher bars together and ensuring they are flush, cut the canvas material to fit the wood frame, leaving enough excess to wrap around the edges.
Using a stretching tool can help achieve a tighter stretch. With the canvas positioned evenly on the frame, start attaching it using a staple gun or hammer and nails, following a specific pattern to ensure even tension. Tap the sides lightly with a hammer to secure the canvas frame as you work your way around.
If using a board instead of stretcher bars, Miracle Muck Glue can be used to attach the canvas material, securing it with a heavy roller. Once attached, allow the canvas to dry for 24 hours before trimming and adding a backing.
This process ensures that the canvas material is firmly and evenly secured, providing a stable base for the application of gesso and the subsequent layers of paint.
<h2>Priming and Finishing the Canvas</h2>
After stretching and attaching the canvas material, the next crucial step in preparing a painting canvas is priming and finishing to ensure a suitable surface for painting.
<ol>
<li><strong>Prime the Canvas:</strong> Apply acrylic-based gesso to the canvas using a wide, flat brush. This creates a smooth and suitable surface for painting.</li>
<li><strong>Apply Multiple Gesso Layers:</strong> Apply several layers of gesso, allowing each layer to dry thoroughly before adding the next. This process enhances durability and paint adhesion.</li>
<li><strong>Sand the Canvas:</strong> After each gesso layer has dried, lightly sand the canvas to achieve a smooth and even surface, ensuring optimal paint adhesion.</li>
<li><strong>Consider Additional Finishing Touches:</strong> For added texture and finish, consider using white acrylic paint or additional gesso layers. This step allows for customization of the canvas surface to suit different painting styles and preferences.</li>
</ol>
<h2>Frequently Asked Questions</h2>
<h3>How Can I Make My Own Canvas for Painting?</h3>
Creating your own canvas for painting involves canvas preparation, DIY stretcher bars, canvas sizing, and a priming process. Consider custom dimensions, artistic texture, and stretching techniques to provide a unique painting surface and framing options for artistic expression.
<h3>What Material Is Used to Make Canvas for Painting?</h3>
Canvas material for painting commonly includes linen or cotton. The stretching process and quality control are crucial for artistic preferences. Consider the environmental impact, custom sizes, surface texture, painting techniques, art supply stores, and preservation methods.
<h3>Is It Cheaper to Build Your Own Canvas?</h3>
Creating your own canvas provides significant cost savings compared to purchasing pre-made canvases. With the ability to control materials and sizes, DIY canvases offer artistic freedom, quality control, and an eco-friendly option, adding a personalized touch to the creative process.
<h3>How Do I Convert an Image to Canvas?</h3>
Converting images to canvas involves transferring the digital image onto a prepared canvas, ensuring proper image resolution and texture. The canvas is then stretched, digitally printed, and framed for the painting process, enabling art reproduction with professional quality.
<h2>Conclusion</h2>
In conclusion, creating your own painting canvas can be a rewarding and cost-effective way to showcase your artwork.
By carefully selecting materials and following the steps outlined in this article, you can customize the size and quality of your canvas panels to fit your specific artistic needs.
Embracing the process of making your own canvas allows for greater control over the materials used and can result in a sustainable and professional finished product.


