How to Make Canvas for Painting
Share
For those who are passionate about creating art, making your own canvas for painting can be a rewarding and cost-effective endeavor. The process of constructing a canvas involves meticulous attention to detail and a careful selection of materials.
From choosing the right type of canvas and stretcher bars to the method of stretching and securing the fabric, each step plays a crucial role in ensuring a high-quality painting surface. There are various techniques and considerations to explore, and understanding the intricacies of each step will lay the foundation for successful canvas creation.
Key Takeaways
- Choose high-quality materials such as durable wood for stretchers and cotton or linen canvas for a suitable painting surface.
- Use stretcher bars for larger canvases to provide adjustable tension and support.
- Apply acrylic-based gesso to prime the canvas and create a smooth surface.
- Secure the canvas tightly over the frame using a staple gun or hammer and nails, following a specific pattern for even tension.
Choosing the Right Materials
When selecting materials for creating a canvas for painting, it is crucial to carefully consider the type of wood for the stretchers to ensure durability and stability.
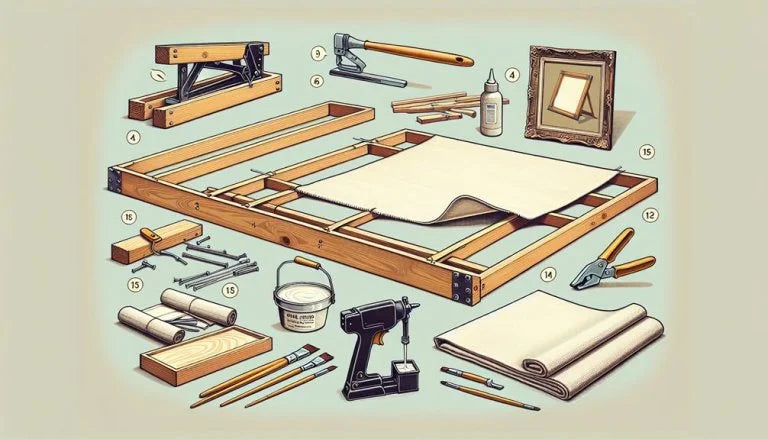
Pine is an excellent choice for the stretchers as it provides a sturdy framework for the canvas. The frame and stretchers are pivotal components, as they determine the structural integrity of the canvas.
High-quality canvas material, such as cotton or linen, is essential for providing a suitable surface for painting and ensuring the longevity of the artwork. Additionally, using stretcher bars for larger canvases is advisable, as they offer adjustable tension and provide support for bigger artworks.
Acrylic-based gesso is the ideal choice for priming the canvas, as it creates a smooth and non-absorbent surface, allowing better paint adhesion.
When assembling the canvas, Tacky Glue and acrylic medium are recommended for sealing, ensuring the preservation of the artwork. It is essential to use a staple gun to secure the canvas to the frame.
Home Depot is a reliable source for acquiring the necessary materials, including the wood, board, and drop cloth.
Constructing the Wooden Frame
To ensure the structural integrity and longevity of the canvas, the construction of the wooden frame is a critical step, building upon the careful selection of materials discussed in choosing the right stretchers.
- Fit the stretcher bars: Begin by fitting the stretcher bars together, ensuring that the notched ends are properly aligned to create a secure wooden frame. Slide the bars together and tap the sides lightly with a hammer to secure the canvas frame in place. This step is crucial for providing a stable foundation for the canvas.
- Cut and secure the frame: Cut pieces of sturdy wood to create the frame and secure the corners using heavy-duty corner braces. Use wood glue to reinforce the joints for added strength and durability. It's essential to ensure that the frame is sturdy enough to withstand the tension of the canvas.
- Staple the canvas: After pulling the canvas tightly over the frame, staple it in place using a staple gun or hammer and nails. Follow a specific pattern to ensure even tension across the surface. This step is vital for preparing the canvas for painting and achieving a professional finish.
Stretching and Securing the Canvas
Stretching and securing the canvas is a crucial step in preparing a durable and professional painting surface. After constructing the wooden frame, the canvas must be stretched taut to ensure a smooth and even painting surface.
Secure the canvas frame by tapping the sides lightly with a hammer after fitting the stretcher bars together. Use a staple gun or hammer and nails to attach the canvas to the frame, following a specific pattern for a secure fit. Apply firm pressure and place heavy books on top of the canvas to create pressure while securing the canvas to the board using Miracle Muck Glue. This will ensure that the canvas is tightly secured to the frame, preventing any looseness or sagging.
Additionally, consider using archival quality materials and extra coats of gesso to make the canvas more durable. When constructing larger canvases, consider the weight and hanging difficulties, as custom-sized canvases can be cost-effective but may be heavy.
Priming the Canvas for Painting
Prepare the canvas for painting by applying a thick coat of acrylic-based gesso using a paintbrush, ensuring to cover the entire surface, including the sides.
- Application of Gesso:
Shake the acrylic-based gesso and pour it onto palette paper. Use a paintbrush to evenly apply a thick coat of gesso to the entire canvas, ensuring that the sides are also covered.
- Drying and Sanding:
Allow the gesso to dry completely before sanding the canvas using circular motions. This process smooths the surface, creating an ideal base for painting. After sanding, apply another layer of gesso and use a hairdryer to expedite the drying process.
- Final Preparation:
Once the canvas is dry, sand it again to achieve a smooth, flat surface, free from any imperfections. This meticulous preparation ensures that the canvas is ready for painting, allowing the artist to work on a flawless and durable surface.
Finishing Touches and Tips
After meticulously preparing the canvas by applying a thick coat of acrylic-based gesso and ensuring a smooth, flawless surface, attention can now be directed towards the finishing touches and tips to enhance the painting process.
When making your own canvas, consider experimenting with different fabrics and materials to create unique textures in your artwork. Additionally, adding another layer of gesso can further enhance the finish and improve paint adhesion.
Customizing the support for your artwork is also crucial, so explore DIY techniques for creating canvas stretchers. This may involve cutting the canvas to size, stapling it to a frame, or using nails and screws for additional reinforcement.
Sharing your project and artwork with others can provide valuable inspiration and feedback to refine your painting process. Furthermore, participating in art contests and challenges can help showcase your skills and gain exposure for your finished artwork, fostering a sense of belonging within the arts and crafts community.
Frequently Asked Questions
How Can I Make My Own Canvas for Painting?
Canvas preparation involves selecting and sizing the fabric, using a stretching technique for a custom size. Priming the surface with gesso ensures quality control. Choosing different fabrics allows for artistic freedom and a personal touch, enhancing creative expression.
Is It Cheaper to Make Your Own Canvas?
In comparing costs, making your own canvas offers budget-friendly advantages, allowing for custom, cost-effective options. It also opens the door to alternative materials, boosting DIY canvas benefits and savings potential.
What Material Is Used to Make Canvas for Painting?
Canvas fabric, typically made from linen or cotton, is used to create a painting surface. The stretching process involves constructing a frame using stretcher bars and securing the fabric. This customizable support structure provides a primed surface for artistic expression using various art supplies.
What Can I Use Instead of Canvas Diy?
When seeking DIY alternatives to traditional canvas, consider using unconventional materials such as upcycled fabric or hardboard. These budget-friendly substitutes offer artistic improvisation and resourceful alternatives, providing unique homemade canvases through creative use of recycled materials.
Conclusion
Selecting the appropriate materials
Constructing a sturdy wooden frame
Stretching and securing the canvas with precision
Priming the canvas for a flawless painting surface
Applying finishing touches
These are all essential steps in creating your own canvas for painting.
By following these steps with care and attention to detail, you can ensure a professional and high-quality canvas that will enhance your artistic creations.


